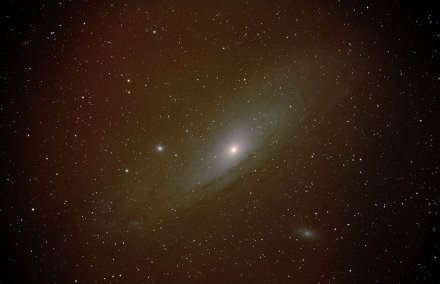
In the last couple of nights, having been kissed by the clemency of the gods that govern the movements of the clouds (petty gods, you know: they will know when you buy new equipment, and they will be jealous and unleash their wrath upon you), I have managed three hours and forty-five minutes on M31, our neighbor galaxy which has set its four hundred billion eyes on us, and will eventually engage in a dramatic collision with our own galaxy in a few billion years. Well, not such a dramatic one, actually, so don’t waste too many energies embracing for impact: during galactic merges, very few stars actually collide, if any. Although it would be enough if an alien star swung close enough to our solar system, to send these tiny rocks we call planets off to places well outside their regular orbits, in the interstellar void.

But I digress. Three hours and forty-five minutes is the time in which the sensor of my camera has been staring at M31. I plan to do a few more hours tonight, should the gods be merciful again, and there’s a lot more post-processing involved if I want to get some decent results: I’m yet to subtract dark and flat frames.

I don’t usually like making bold statements. As a matter of fact, neither should you, for you might change your mind one day. But here is one: astrophotography will stretch the limits of your patience.

Personally, I’ve always thought patience was one of my strongest assets. That still holds true, but I had underestimated the sheer quantity of such a feature I needed, in order to partake the joys of astrophotography.

My adventure with this subtle union of science, technique and art has not lasted two months yet; you might say it hasn’t lasted 3 days yet, though, because that is the number of times enough light from outer space has managed to pierce the thick coat of clouds that seems to perpetually cover this country, enveloping its lands in arctic temperatures.

Countless things have gone wrong in these hours. Some of them are to be attributed to my lack of experience, and have been superseded by my learning how to cope with them, how to anticipate them, and how to let flawless technique prevail the unexpected. Some others, sadly, are due to factors well outside my sphere of influence.

Perhaps the tone of frustration you read between the lines is due to the sad state of the software industry. Let me elaborate. I have been creating software for the most part of my life: a good two thirds of it. That has effected the development of my brain in a way that I’m not even going to attempt and explain, because, as much as I don’t like to say so, you wouldn’t understand. I see the world with different eyes than most people: I see physical things, mechanical things, as obstacles. I see the very substance of concrete things as a design flaw, something that makes everything awkward and needlessly complicated. I see that every day, every moment, in everything I do with my hands. And I’m not that bad with them.

Software, on the other end, exists purely in my mind. It’s a magical world where everything can happen. Where everything eventually will. Where I’m not bound by the silly laws of physics. And the undeniable fact that the whole software industry is nothing but an utter failure, saddens me deeply.

I hear your gulp. I see your outraged face. The entire software industry? An utter failure? They sound like words a bitter old man would speak. I get it, we have wonderful things. Software has made our world so much different. So much better. But in a day and age such as ours, why would programs ever need to crash? Why would they ever need to be unresponsive? Why would they ever behave unreliably? Why would everything revolving around the world of software and technology seem like a massive plot to frustrate the hell out of innocent people who just want to get things done?

The software I write is buggy too, let’s be clear about it. My coworkers know. And I know very well that writing software is hard. How would you explain, to a person who is completely ignorant of the matters of software, that a typical software product runs a cycle of tens of thousands of bugs before it’s considered releasable?

Managers, as of late, speak of bugs calling them errors. Is a bug really an error, a mistake attributable to incompetence? Will we ever live in a bug-free world? I guess this is utopia.

So, back on the topic of astrophotography, I had actually hardware problems last night. Namely, my five-meter USB extension cords seem to fail when it’s cold. Last night, at -13°C, both my cameras failed to talk to the computer. Of all the things that can go wrong. I resorted to wiring a second computer closer to the telescopes, to avoid using extension cords, just in time to be warmly greeted by the familiar thick coat of clouds. How are you doing? - they said, we missed you. I looked at them and could see that they were troll-faced.

When frustration builds up, little things can be enormously annoying. Like the login screen on this Ubuntu laptop I’m using right now: if you input the wrong password, it will be stuck on Checking password… for something like five minutes. Do you know how long five minutes are when you’re in a hurry because clouds are marching in, because you’re sick of putting shoes on, jacket on, coat on, hat on, gloves on, and then going back inside taking shoes off, jacket off, coat off, hat off, gloves off, and because you just want to get things done but what seems to be a perennial series of minor issues keeps getting in your way?

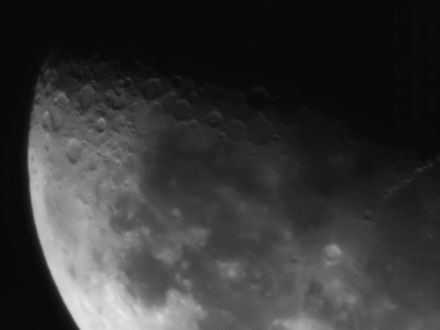
Luckily, it looks like this extension cords issue is now solved by putting a powered USB hub at the computer’s end. So I got up in the morning and the moon was shining through the morning light. I wanted to try the USB hub idea, so I said to myself: let’s take a picture of the moon..

In a way or in another, something came out. Perhaps not good, but a beginning. The seed of a hope. Something that says don’t give up, it might be hard and a million things can go wrong, but you just have to sort them all out.

Waiting for M39

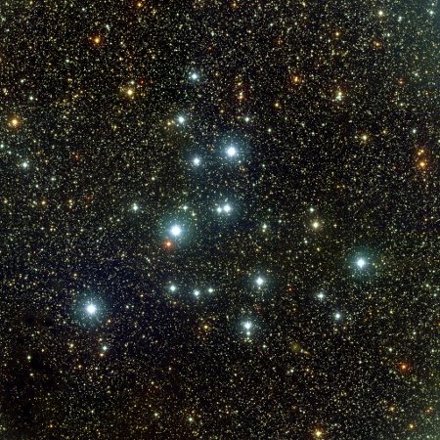
There’s been a very long streak of cloudy nights, and I hear that that’s the standard fee any astrophotographer needs to pay after any purchase relative to astrophotography. Fair enough. Given that, as mentioned before, I haven’t modified my Canon 450D so to remove the IR-Cut filter, for the time being I will be shooting solely objects which don’t have particularly noticeable emissions in the infrared. This short blog post is to remind myself of the next target: M39.

This beautiful image is also my quality target, of course, although I think it was taken with a telescope with a diameter of 0.9m…

M39, also known as NGC7092, is a young open cluster of stars some 800 light years away. Mostly comprised by warm blue stars, it should be aged from 230 to 300 million years. Thirty stars are proven to belong to the cluster, all inside an imaginary sphere with a diameter of seven light years. These thirty warm young stars shine with the brightness of 830 of our Suns.

M39 is also moving towards us at the speed of 28km/s. I sincerely hope I’ll manage to image it before it hits us in approximately 8.5 million years! (Just kidding: it won’t probably hit us.)

Ever since I have gifted my patio with a beautiful zinc coated steel pier, thus gaining the ability to have a permanently polar aligned mount, it’s got easier to remotely control my whole setup with minimal effort. Of course, by minimal, I still mean considerable. You will understand if you are an astrophotographer too.

The pier is located only a few meters from the windows in my living room, and that means that I can use 5 meter long USB extensions to reach my laptop which is comfortably sitting, as it should, in my lap. Does that spell r-e-m-o-t-e to you? It certainly does not to me.

I would be constrained to stay on the couch, and there would be three cables running to my laptop: one COM cable that’s used to connect to the SynScan controller of my HEQ5, one USB cable that comes from the Canon EOS 450D camera, and one USB cable that comes from the QHY5 guide camera. Luckly, the laptop I’m using has a dock that has a COM port, or else I would have to use a COM-to-USB adapter, bringing the number of needed USB ports to three. And aren’t we forgetting the external hard drive? Four. And how about the mouse? Five. I have only two USB ports on this old T43 laptop, and the one USB powered hub I have tried ended up causing a lot of problems, with annexed nerve wreckage.

Yeah, that was certainly not remote.

Right next to the pier, there’s a certain tools/storage room, whose secret agenda is to come between my lenses and some astronomical object many light years away. When it’s not too busy doing that, it serves as a place for a lot of junk. In this room I also have an old computer which turned out to be perfect as a dedicated astrophotography box. It’s got two Intel Core 2 Duo processors, and 2GB RAM. Plenty for my purposes.

The problem? The room does not have wired connectivity (I find that odd, as it certainly has power and the rest of my house if littered with CAT5 sockets) and the wireless signal coming from the router inside is too weak to reach the utterly underpowered antenna sticking out from the back of the computer, alone in a corner, covered by a ton of dusty cables. Luckily I had a Linksys WAP56G wireless access point sitting around, and that would’ve made an excellent wireless repeater! Except that the stock software would only let it work, as a repeater, with some other Linksys router (namely, the WRT56G, i.e. something in the same family).

And that’s where Open Source comes to the rescue, thanks to what I have learned to appreciate as the immense power and usefulness of DD-WRT. I even tweeted my love for it. DD-WRT is a replacement firmware compatible with lots of routers and access points, and it will definitely enrich the capabilities of your device. Give it a try. It has been quite easy to set it up as a wireless repeater for my main wireless network, and my mind was (figuratively, you just need to specify, these days) blown away when I learned that it could simply configure the LAN port on the AP as a switch port. That means that I can have the astrophotography box wired to the AP, the AP linked to my main wireless network, and my laptop anywhere in the house, linked to the same network, remote controlling the astrophotography box!

To achieve the actual remote controlling, I have resorted to the even so popular VNC. Some networking magic and a little port forwarding later, I can now literally see the content of the screen of the remote computer right in the screen of my laptop; wirelessly and efficiently.

So my astrophotography routine can now be broken up in the following steps:

  1. Look at the sky.
  2. It’s cloudy.
  3. GOTO 1.

Just kidding. Here it is:

  1. Remove the Telegizmos Series 365 cover from my pier, uncovering the HEQ5 mount.
  2. Mount the optics on top of it.
  3. Turn on the computer in the tools room. Note that the cables to the cameras and mount, whose ends belong to the computer, are already connected.
  4. Connects the cables to the appropriate ends in the cameras and mount. Connect the power of course.
  5. Go inside and connect to the astrophotography box from the laptop, via VNC.

Considering that the mount is already polar aligned, and that, thanks to the brilliancy of EQMOD, as long as I remember to park the scope after each session, I won’t need to repeat any 3-star alignment or anything, everything should be ready to start imaging.

I probably need to focus at this point, so I can just go outside with the laptop in hand, have a look at Live View from Canon EOS Utility, and adjust the knobs accordingly.

I can now simply go inside, program the shooting, and I can continue using my laptop without worrying that I might do something that interferes with the imaging.

Neat, isn’t it?

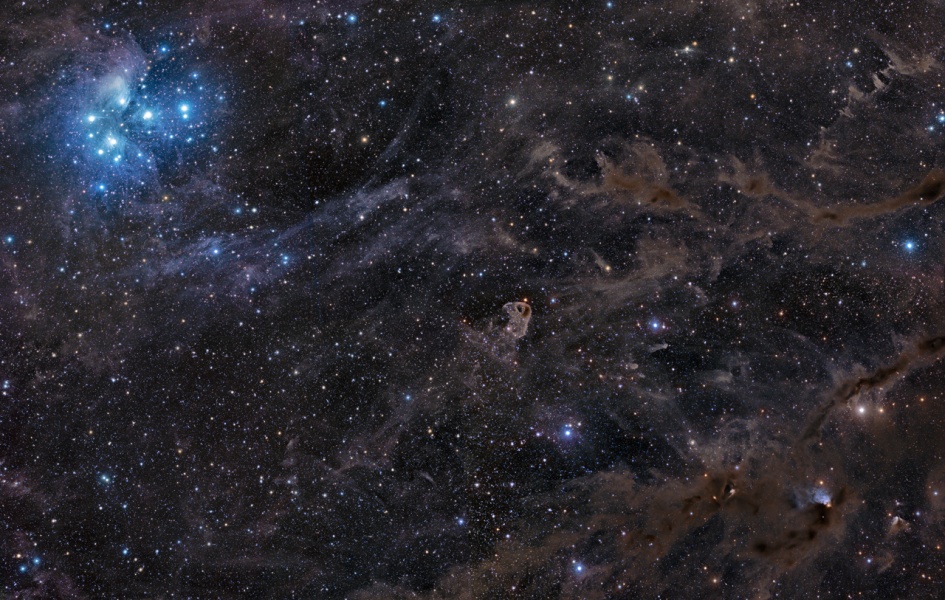
I find it really hard not to erupt in smothering expressions involving fierce cursing and the invocation of man-made mythical beings, when looking at this picture. Sadly, I did not take it. Most likely, I never will, as it’s been taken with expensive gear under crystal clear skies. Add a solid eighteen hours of integration to that, and the fact that on good years, I’ll see eighteen hours of cloud free skies throughout the whole year, and you will understand the reasons for my excitement above. The photograph shows the familiar seven sisters, and an incredible amount of dust in the region that extends from the Pleiades to Taurus and Orion’s arm. Plus a generous amount of tiny galaxies in the background.

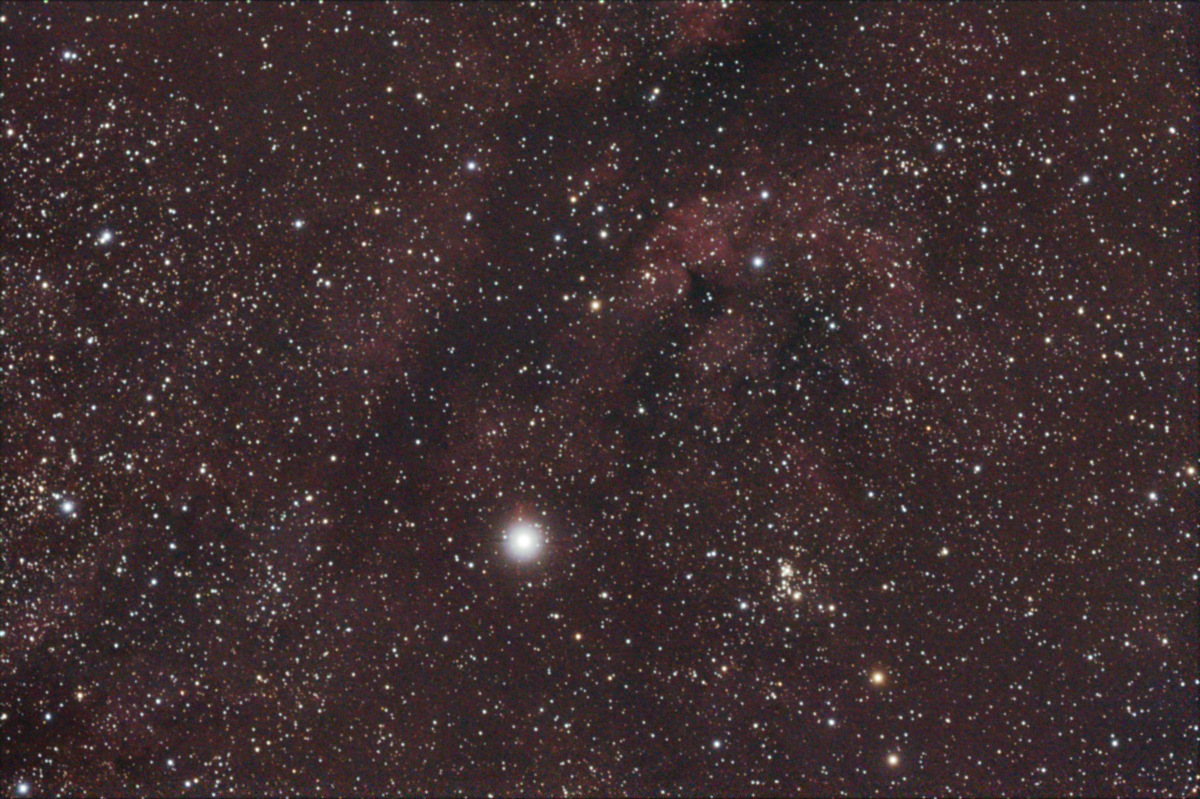
IC 1318, take 2

For some reason, I ended up trying this object again, despite it not being really good for my unmodded camera.

I have learned that bumping the exposure time from 90 seconds to 600 won’t help, as long as all the signal gets nonetheless filtered out by the IR filter of the camera.

As you can see, despite the longer integration time, this shot is hardly better than the previous one.

I’d better stick to galaxies and clusters until I get a modded camera. Here’s the previous shot, for reference:

I think the newer one is softer and less noisy, if that’s of any consolation!

Over the last two weekends I have embarked myself on the project of upgrading my yard with a steel pier, on which I can place my astrophotography setup. No longer will I have to risk tripping over the legs of the tripod, and no longer will I have to waste precious time (which could have gone to imaging) polar and star aligning my mount. The telescope pier will be home for my HEQ5 mount for the whole winter, protected by a Telegizmos Series 365 cover. This way I can invest several hours achieving a perfect polar alignment, and then have it untouched for the whole imaging season. During the summer, then, given the lack of dark hours at my latitude, the pier can serve as a base for a nice pot of flowers, so to please the wife!

First, enjoy a picture of the finished product, and then I’ll start going through the phases of the construction.
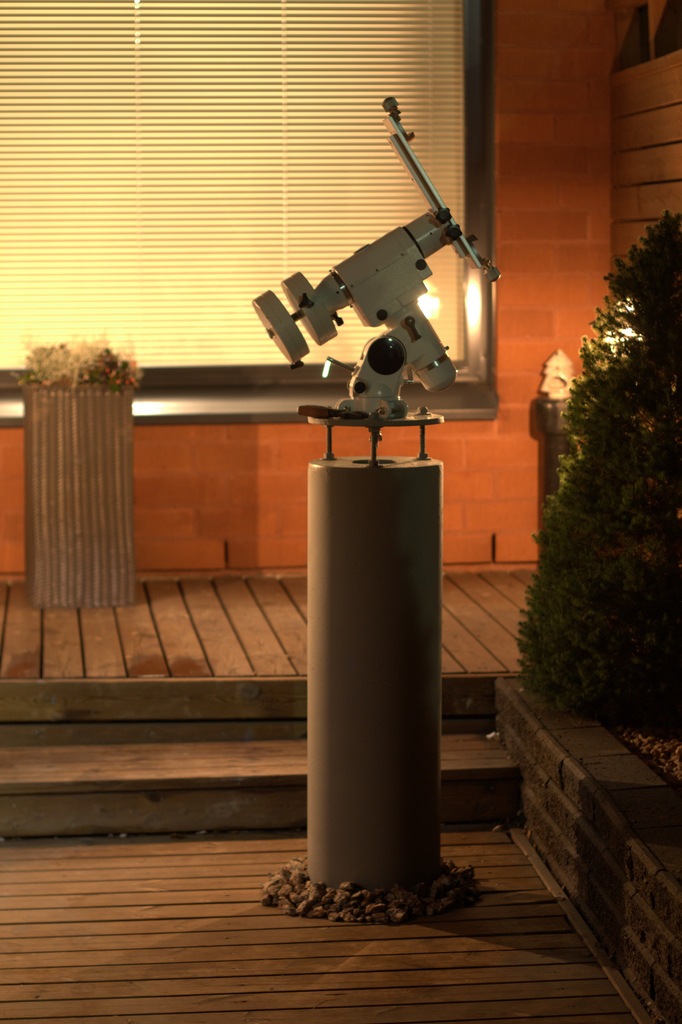
What I needed was a structure that was physically separated from the patio in my backyard, so that me walking there wouldn’t induce vibrations and ruin photographs. I have been researching what other people have been doing, and, unfortunately, creating the whole pier out of concrete (by filling a sonotube) was not viable for me: I wanted something that could be taken apart when, eventually, I’m going to move to a new house. The next best option, then, was steel.

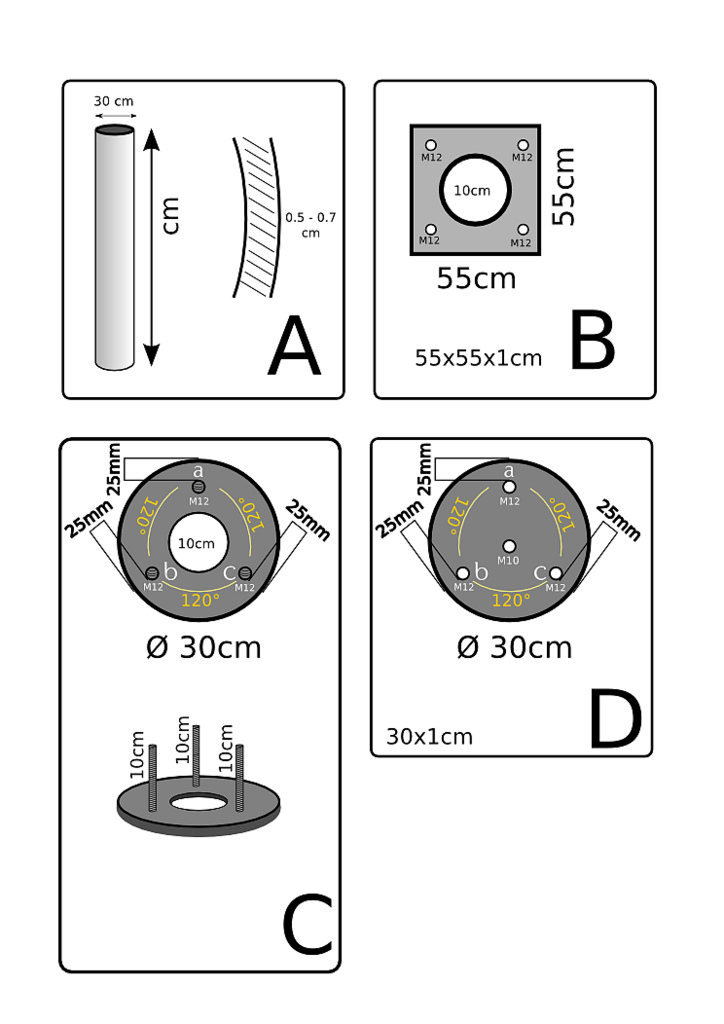
The maximum flex that good astrophotography can tolerate is half of an arc-second. Given the properties of steel, a pipe of about 0.3m in diameter, 5mm thickness, and extruding from the ground about 1m, would have a flex of around 0.3 arc-seconds.

I proceeded with drawings for the steel factory. Since I don’t speak the language of this country well, I did my best to represent everything with drawings, using no words. Here are the parts involved:
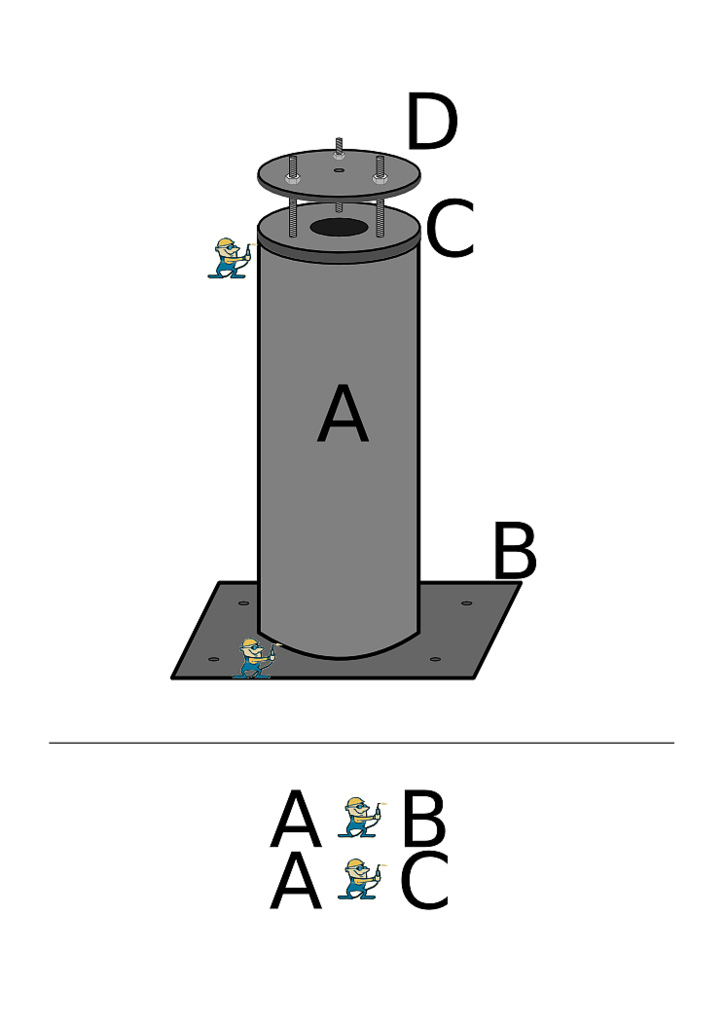
And this is their assembly:
The project started with the goal of identify the sweetest spot in my yard. I had two unfortunate constraints:

  1. There’s a lamp post only a few meters away;
  2. In most places around the small yard, the sky view is obstructed by structures like my own balcony and roof, or my utility hut.

Despite the lamp post being a nuisance, It was better than seeing no sky at all, so I decided to build the pier in the spot of the yard that enjoyed the amplest portion of the sky.
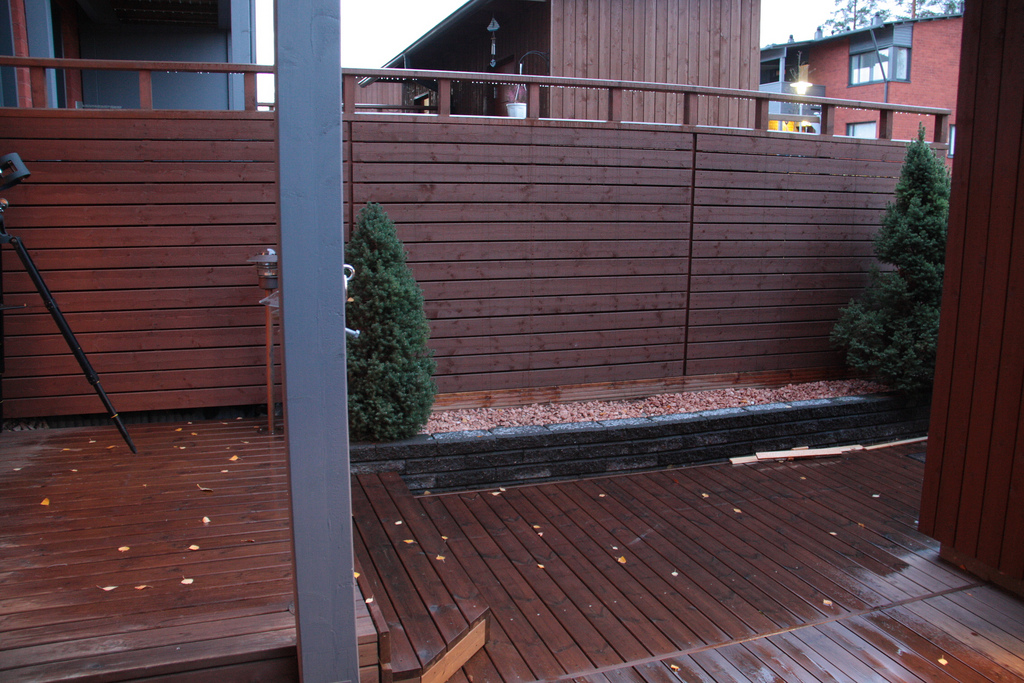
So I proceeded to remove the boards that make the patio. Each of them had 4 screws, and, as each and every screw that I have ever encountered, they too were just lousy. Only few boards came out without having to force the stripped screws out.
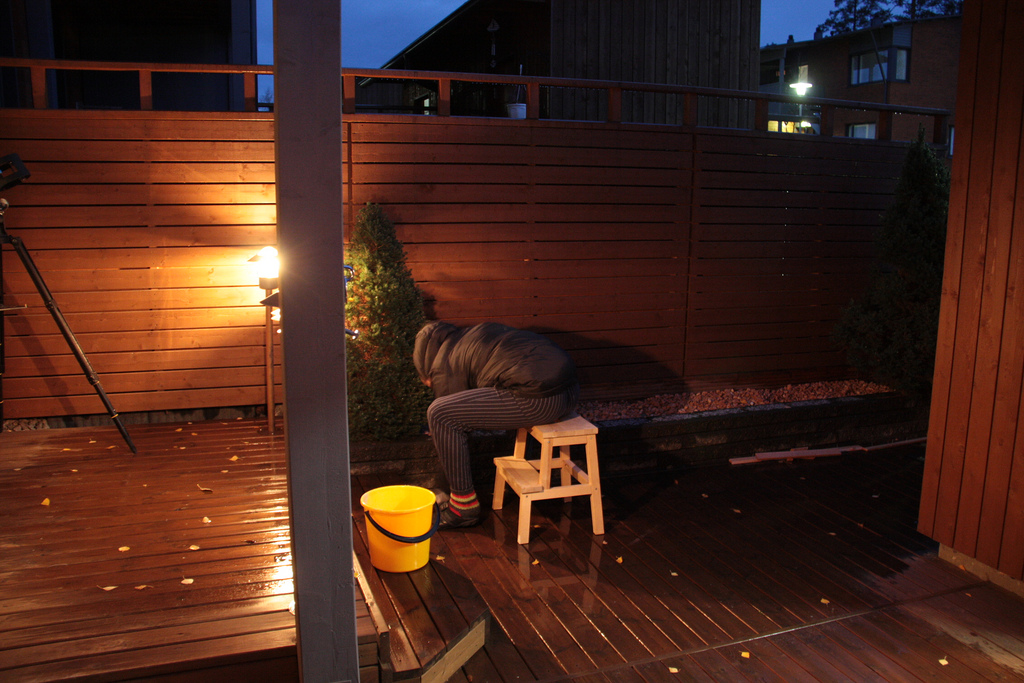
And finally I was ready to start digging!
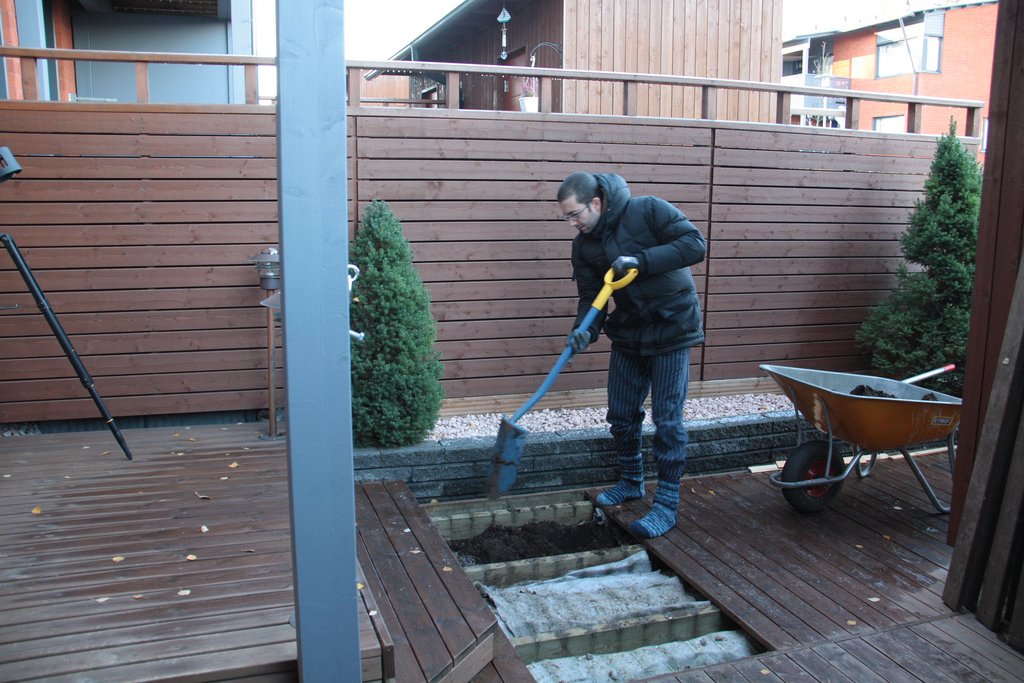
Right under the patio there was a cover, that I guess prevents the ground to get too wet, so I wouldn’t run into freeze/thaw issues. Right under it, there were 15cm of nice soft soil, likely put there in case I ever wanted to remove the patio and grow a lawn. That was dug out easily. Then the hard part started: the soil became really hard, and full of rocks of various size. Lots of pebbles, many fist sized rocks, and a few big and heavy ones, the size of my head. After digging 30cm, I found an insulating layer of polystyrene, 10cm thick. I could remove it by breaking it down to smaller pieces with sharp hits of my hoe. The hard rocky soil continued for 30 more centimeters, and then I ran into another layer of polystyrene. I decided that at a depth of 85cm I could stop digging. The soil looked properly insulated, and it would stay dry; so I didn’t need to worry about getting below the frost line (1.7 meters here in southern Finland).

Mixing the concrete was up next.
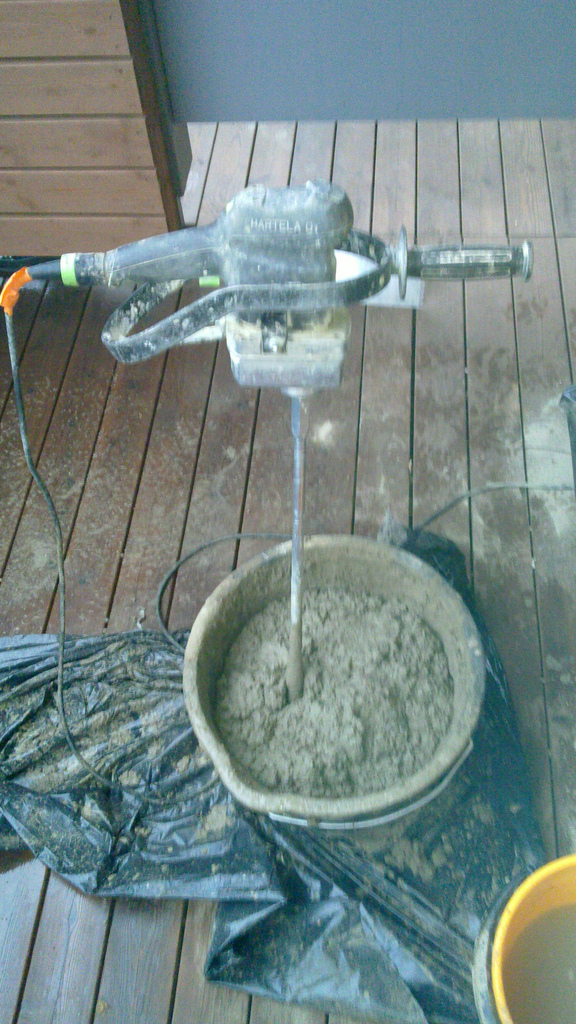
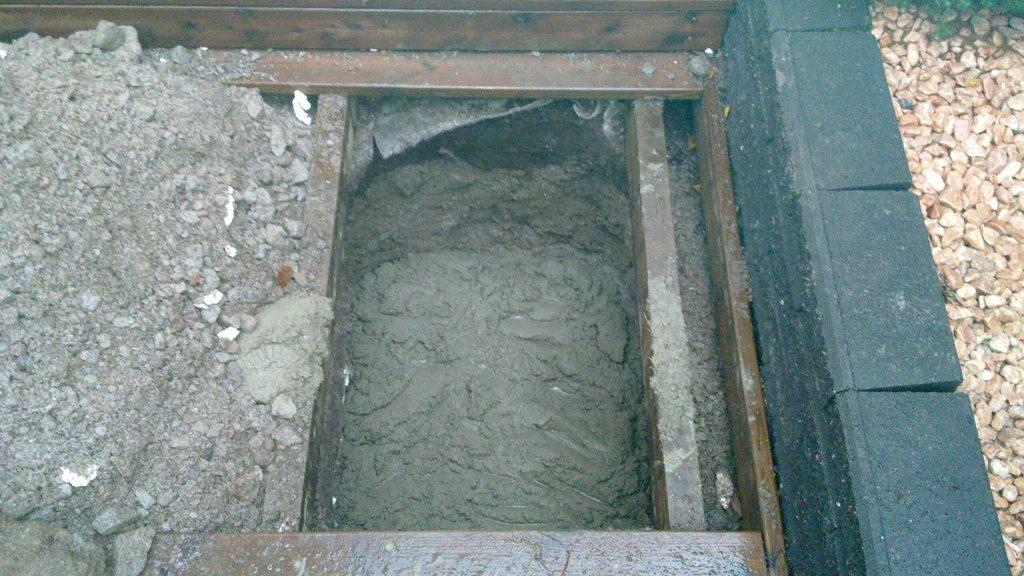
I wanted to have a solid enough base, so that the pier wouldn’t move at all. I purchased 8 bags of 25kg of mixed concrete (that is cement mixed with sand and dirt), and that gave me a foundation that is almost 30cm deep, and weighs almost 300kg. Here it is, poured into the hole:
While the concrete settled a little, I proceeded to zinc the steel pier, so it would resist rust better. That’s my father in law blow drying the zinc:
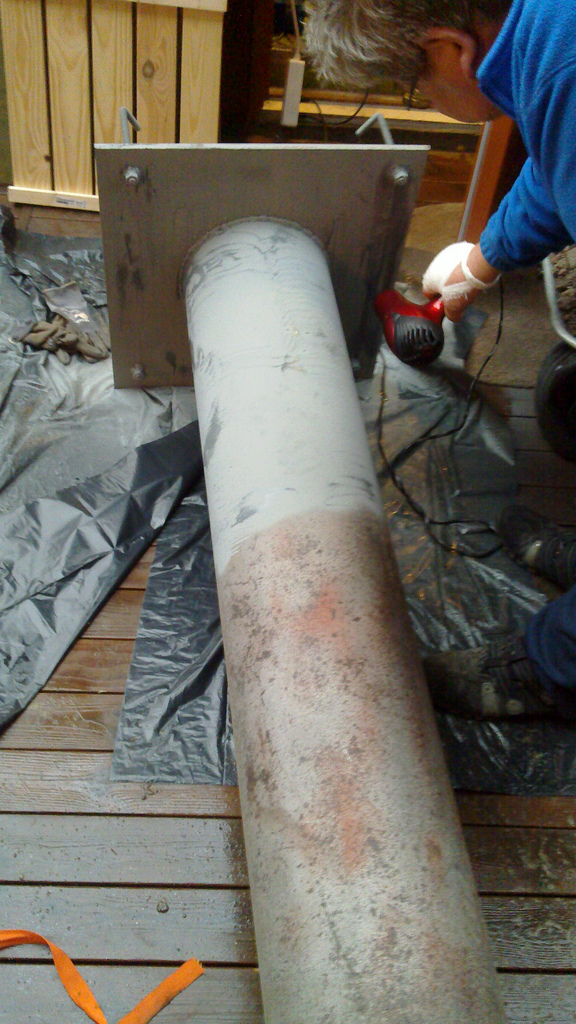
The only deviation from the plan was caused by the fact that people at the factory where I purchased the steel pipe made a mistake. They second guessed my plan and decided to thread the four holes at the base. This meant that I had to screw the threaded rods in the holes right away, and couldn’t simply leave the rods in the cement. Now, if I ever want to take the pier out, I will need to cut the rods from the base. So, with some help, I finally lowered the pier into the hole. There was barely enough room, and it had to be tilted to fit through the two carrying posts of the patio. Here it is, still wet with zinc:
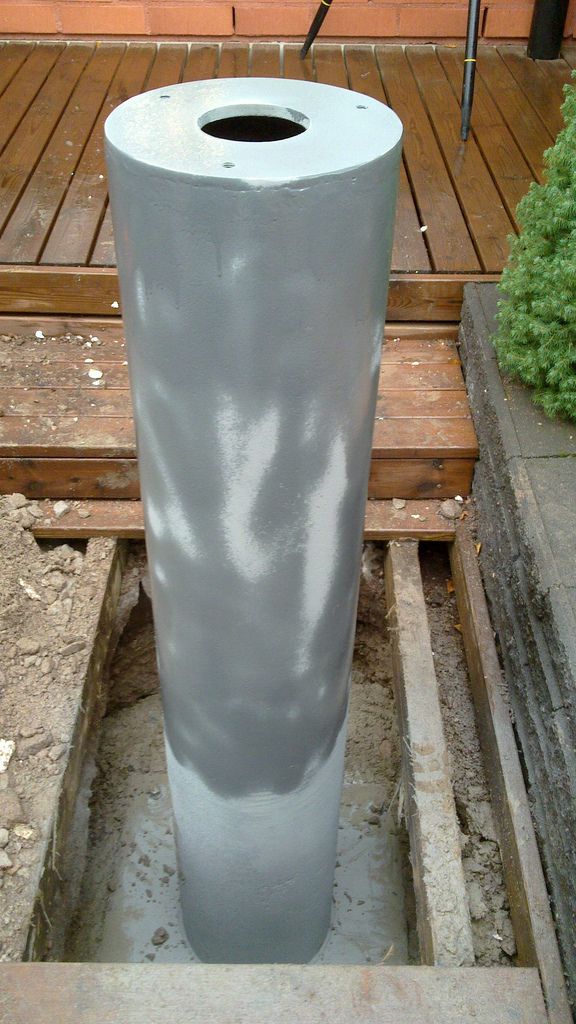
After cutting the original boards so that there would be a hole for the pier and setting them again, after a lot of hard cleaning on the patio, and after placing decorative stones to hide the gap around the pier, here’s the final result:
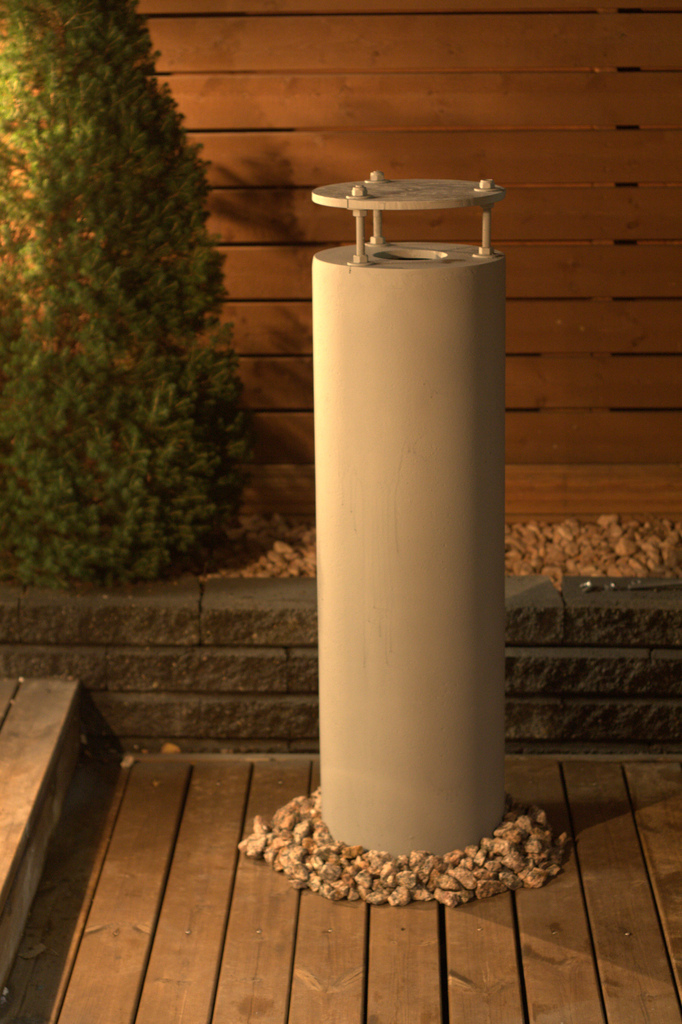
All I need now is ceasefire from these clouds, and I can start imaging on my pier!

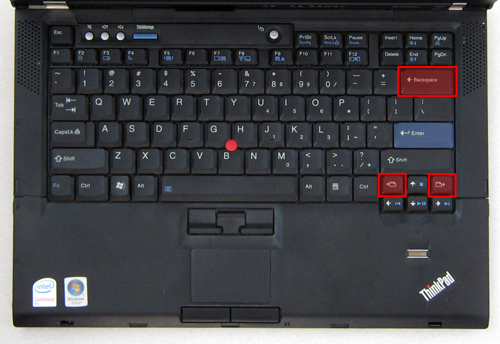
Look at the image below. It’s the photograph of a keyboard very similar to the one of the IBM ThinkPad T43.

See the keys I have highlighted? Those are the ones designed with usability in mind.

Hey, let’s give the user three different ways to accidentally navigate away from the web page they’re looking at.”

But wait… if they navigate away accidentally they’ll lose what they were typing. That’s in most browsers!”

I know, right?” Wink.

This dialog may or may not have happened at IBM, but fact is, those page navigation keys are way too close to the directional keys. And the Backspace, so close to the Enter key, also raises issues.

Somebody tried to increase the usability of this keyboard by providing more choice, more ways to do something. It turned awry instead.

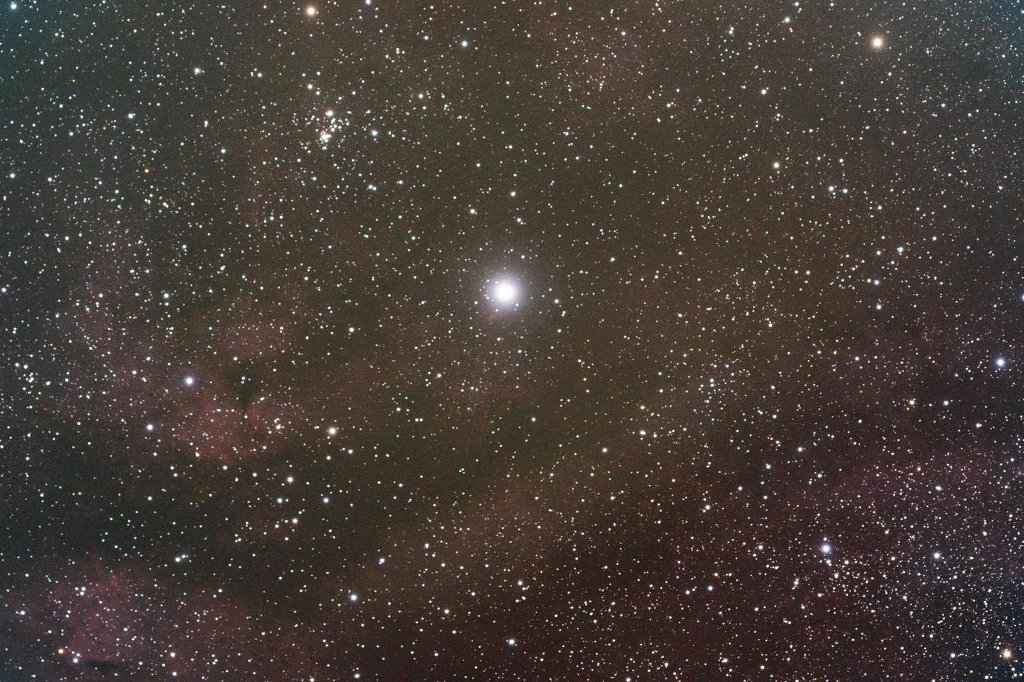
Sadr and IC 1318

SADR (Gamma Cygni). Pronounced more like “sudder” or “sadder,” the star itself is nowhere near as obscure as its proper name. Mid-second magnitude (2.20) Sadr is the Gamma star of the constellation Cygnus, the Swan, and lies prominently at the center of Cygnus’s famed asterism, the Northern Cross, at the crossing point of the staff and crossbar. The name, however, refers to the great ancient celestial bird, and comes from an Arabic phrase that means “the hen’s breast.” Sadr lies in a magnificent portion of the Milky Way as it runs along Cygnus’ long axis. It is at the northern end of the famed Great Rift, a dark lane that appears to divide the Milky Way — the disk of our Galaxy — in two and extends down through Sagittarius and Scorpius. The Rift actually consists of a huge complex of fairly nearby dust clouds in which stars are being born. More detailed study of the region around Sadr show it to be filled with luminous interstellar clouds as well as the remnant from an exploded star, none of which are directly connected with it. Nevertheless, the star itself intrigues as a fairly unusual class F (F8) supergiant. Most of these brilliant stars are either fairly hot or quite cool and reddish. Few, like Sadr, are yellow-white and in the mid-temperature range near 6500 degrees Kelvin, not much hotter than the Sun. Truly luminous as befits a supergiant, the star is around 65,000 times brighter than the Sun. It does not dominate its part of the sky only because of its rather large distance of 1500 light years (its light dimmed by nearly half a magnitude by interstellar dust absorption). Though the star is in the process of dying, having ceased hydrogen fusion in its deep core, it is not possible to know just what state it is in and whether it will heat or cool at its surface, either course taking longer than any human will see. From its current brightness and temperature, the original mass of the star at birth must have been around a dozen times that of the Sun (though some estimates range higher), close to the limit at which stars are believed go explode as supernovae. However, the distance is not all that well known and Sadr might be fainter and less massive than supposed. Sadr is close to a region of temperature and luminosity in which stars become unstable and pulsate, varying in brightness. Though it is not obviously variable, the star does appear to pulsate somewhat in a complex way with a 74 day period.

Sadr (near the center), in a complex region of the Milky Way, is surrounded by reddish interstellar clouds that are excited to glow by the ultraviolet light of hot stars, IC 1318.

Details: 18x90” frames at 1600ISO 18 darks and offsets 10 flats and dark flats

SkyWatcher ED80 Apo on HEQ5.

One little known new feature of Maemo5 PR1.2 is the support for custom smilies in Conversations (which I implemented).

I have made a smiley theme based on Tango icons, but it’s not yet in the repositories. Here’s what it looks like:

You can install it by downloading this file: conversations-tango-smilies_0.1_all.deb, and copying it over to your N900.

Then open an X-Terminal, become root and do:

cd /home/user/MyDocs; dpkg -i conversations-tango-smilies_0.1_all.deb

Once it’s finished, switch to Conversation, go to Settings, and you will have a new button, called Smileys theme. You can select your newly installed Tango theme.

Note: the theme will not work with SMSs and Skype chats. All the other accounts, and SMSs, will use the new theme.

After setting the new theme, go to an IM conversation and see if the new icons are in the smiley picker. If not, a reboot should do.

Enjoy!

« Page 11 / 14 »